

Nearly 90 percent of shots through glass lose contrast from glare or smudges, which is why your first move should be a clean viewing pane and a quick check for scratches. You’ll get sharper reef colors when you hold your lens close to the glass, tilt it a little, and brace for the boat’s small shudders and creaks. Then the real fun starts, because a few smart tweaks can turn murky snapshots into clear underwater scenes.
Key Takeaways
- Clean both sides of the glass with a microfiber cloth, then dry fully and avoid scratched or mineral-spotted areas.
- Hold the lens close and tilt it 10–30 degrees to reduce glare from sun, sky, and cabin reflections.
- Brace yourself and the camera against rails, glass edges, or a folded towel to counter boat vibration and roll.
- Use shutter priority at 1/500s or faster, open the aperture, and raise ISO as needed for sharp underwater shots.
- Shoot in burst mode and consider a polarizer or RAW capture to improve keeper rate, glare control, and post-processing flexibility.
Clean the Viewing Glass First
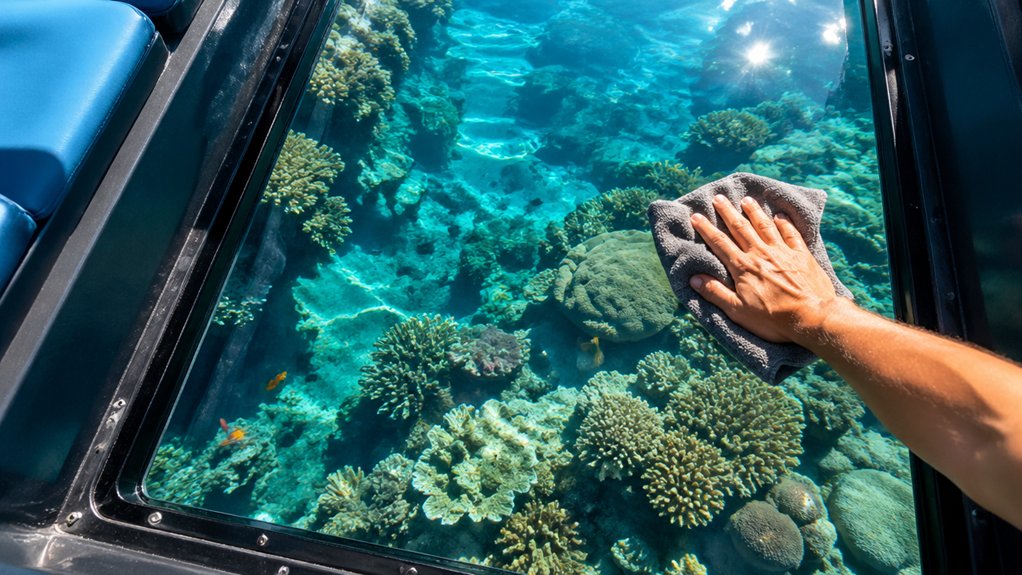
Start with the glass, because even a brilliant reef scene looks flat through fingerprints and salt spray. First, wipe both sides with a lint-free microfiber cloth and a 50/50 mix of distilled water and isopropyl alcohol. Then inspect the pane in bright light. Tiny scratches and water spots love to hide until you’re ready to shoot. Mark them and shift your position so they don’t sit over your subject. Use a squeegee on large panes and cotton swabs along the edges. Dry everything well, since streaks show up fast. If mineral residue hangs on, try a mild vinegar solution, then rinse with distilled water. For quick resets in changing weather conditions, I recommend taking pre-moistened glass wipes and a compact blower. Before shooting, adjust your phone using the best phone settings for glass-bottom boat photos to reduce glare and improve underwater detail.
Angle Your Camera to Reduce Glare
When glare turns the glass into a mirror, a small tilt usually fixes it fast. Try a tilt technique of about 10 to 30 degrees against the glass. That shift changes the reflection angle, so overhead sun and cabin lights bounce away from your frame. Keep the lens close to the pane. If reflections stay low, point straight at the scene. If not, move slightly off axis until the shine slips outside the picture.
Add a polarizer combo by rotating the filter as you angle the camera 20 to 45 degrees. You can cut reflections dramatically. Use vertical repositioning too. Crouch or stand taller to trade bright sky glare for darker water tones and richer contrast. Mark your angle and repeat it quickly between shots. For the best glare reduction, combine a slight camera tilt with careful repositioning until reflections fade from the glass.
Brace the Camera Against Boat Motion
A clean angle helps with glare, but the boat still has its own opinion about your shot. To tame that wobble, give your camera a firm home base. Press it lightly against the rail, the glass edge, or a folded towel so vibrations lose some bite. Good hand positioning keeps your grip relaxed instead of shaky. Add foot anchoring by planting your stance wide and steady on the deck.
Then bring in elbow locking, not as a stiff pose, but as a compact frame that moves with the boat. Watch the horizon, feel the pitch, and shoot in the brief lull between rolls. If you carry a monopod, keep it short and locked, then press it into the deck or rail for quick support. Following boat safety essentials also helps you stay balanced and focused while shooting through the glass.
Use Fast Shutter Speeds and Burst Mode
Because the boat never fully stops moving, shutter speed becomes your best insurance. Set at least 1/500s, and push to 1/1000s or 1/2000s when fish dart past and the hull gently pitches and yaws. If light drops, try not to slip below 1/250s for slower scenes.
Preselect shutter priority so your camera protects that fast speed while exposure shifts over dark water and tinted glass. Open your lens to f/2.8 through f/5.6 when you need more light, but keep the reef or turtle sharp. Then fire continuous bursts at 5 to 20 fps. You’ll catch several frames in one pass, and one usually lands crisp. If the scene gets dim, use ISO ramping in steps, like 800 to 1600 to 3200, and watch noise. If you start feeling uneasy while tracking moving subjects, stay steady and brace yourself so you can keep your framing controlled.
Use Reflections for Creative Shots
Why treat the glass as only a window if it can also act like a mirror? Tilt your camera 10 to 20 degrees to catch coral below and a crisp reflection above without ugly double images. Add a polarizing filter, then rotate it until glare fades or reflections bloom. This works especially well on glass bottom tours, where shifting light and water movement can turn simple reflections into striking layered compositions. Build narrative framing by giving the reflected sky, rigging, or a passenger about one third of the frame. That balance makes silhouette layering feel intentional, not accidental. Expose for the brighter reflection, or bracket by 1 to 2 EV so you can blend highlights and underwater shadows later. Clean the glass first. Reflections love to reveal every smudge like a critic. Shoot RAW too, because scratches, color grading, and cleanup all get easier in post.
Frequently Asked Questions
What Lens Works Best for Glass-Bottom Boat Photography?
Choose a wide angle lens first; you’ll capture the reef and boat context cleanly. Add a macro lens for tiny subjects close to glass, and a telephoto lens when you’ll isolate distant marine life better.
Should I Use a Polarizing Filter Underwater Through Glass?
Yes, you’d be battling glare like a superhero, because a polarizer boosts polarization effectiveness, helps filter glare, and improves reflections control. Just don’t expect miracles underwater; you’ll lose light, so compensate with ISO or aperture.
What Camera Settings Help Preserve Underwater Colors?
You’ll preserve underwater colors by shooting RAW, setting white balance around 5200–7000K, choosing vivid color profiles, using slight positive exposure compensation, opening your aperture, and raising ISO moderately so you keep shutter speeds and tones.
How Do I Protect My Camera From Salt Spray?
Shield your camera like a sailor battening hatches: use a waterproof casing, keep wipe cloths handy, apply corrosion inhibitors, rinse gently with fresh water, dry it shaded, and stash it in a sealed bag afterward.
Is Shooting in RAW Better for Underwater Boat Photos?
Yes, you should Shoot RAW for underwater boat photos; you’ll gain benefits like highlight recovery, color correction, and shadow detail. Your Post processing workflow improves, though you’ll need more File storage and shorter bursts aboard.
Conclusion
You’ll get better glass bottom boat photos when you treat the pane like a lens, not a window. Clean it well, press in close, and tilt your camera just enough to dodge glare. A fast shutter matters because a boat moving only 5 knots can shift nearly 8 feet each second. That tiny wobble becomes blur fast. Stay steady, shoot bursts, and watch reefs, fish, and sun flicker into sharp view below your shoes today.