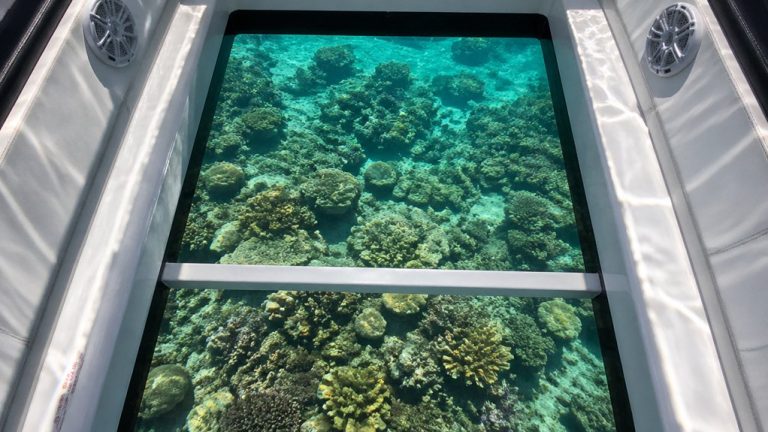
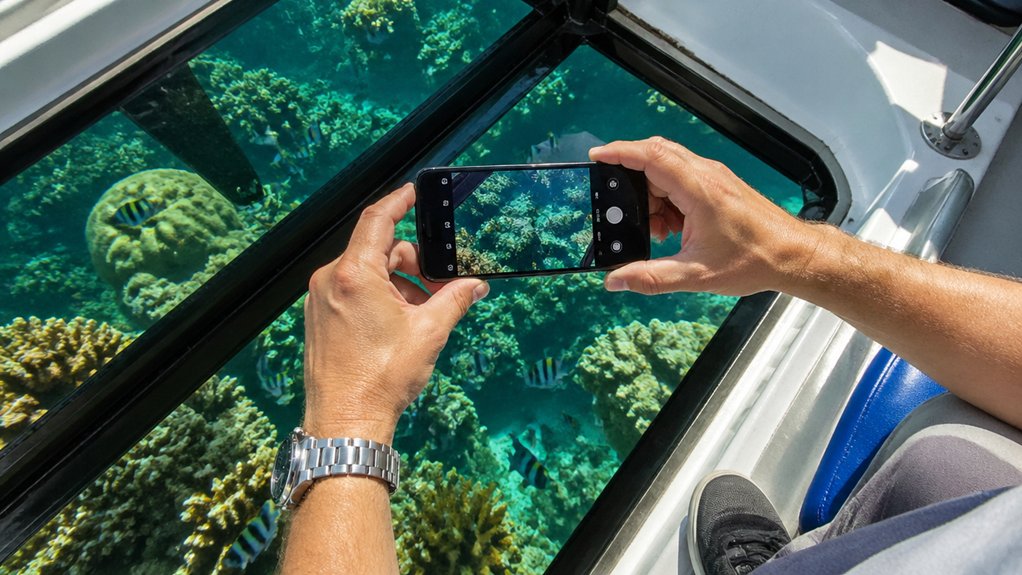
Is it really true that a few phone settings can turn murky glass-bottom boat shots into crisp views of coral and darting fish? You’ll find that the right setup matters fast when the boat hums, the sun flashes on the water, and every second counts. A clean pane, locked focus, full resolution, and a smart shooting angle can change everything, and the small tweaks ahead are where the real difference starts.
Key Takeaways
- Use full resolution with RAW or ProRAW if available, and keep digital zoom off to preserve coral texture and cropping flexibility.
- Turn on gridlines, disable flash and Live Photo, and frame slightly wider for easier straightening and glare-free editing.
- Lock AE/AF on the clearest glass area, then adjust exposure to brighten reefs or reduce surface reflections before shooting.
- Use Action or Motion mode, or a shutter around 1/500s with low ISO, to keep fish and ripples sharp.
- Enable HDR and burst mode, hold the phone close to the glass, and tilt it slightly to reduce glare and catch sharp frames.

Oahu Catamaran Snorkel Tour: See Turtles 100% Guaranteed
Experience one Viator's 2025 Top 20 Best Excursions in the country. This Oahu Catamaran snorkel tour offers unbeatable value and family-friendly fun f...

Oahu Grand Circle Island Experience from Waikiki
Enjoy Grand Circle Island experience tour with breathtaking views of Amelia Earhart Lookout on Diamond Head, admire...
Oahu Circle Island Snorkeling Tour: Dole, Pali Lookout & More
Looking for the BEST VALUE & MOST COMPLETE Circle Island Snorkeling Tour? Join us for the ultimate full-day, action-...

Parasailing Experience in Waikiki, HI
Experience the thrill of Oahu parasailing on this unforgettable 1-hour adventure from Waikiki. Soar up to 1,000 feet...
Set Up Your Phone Before You Board
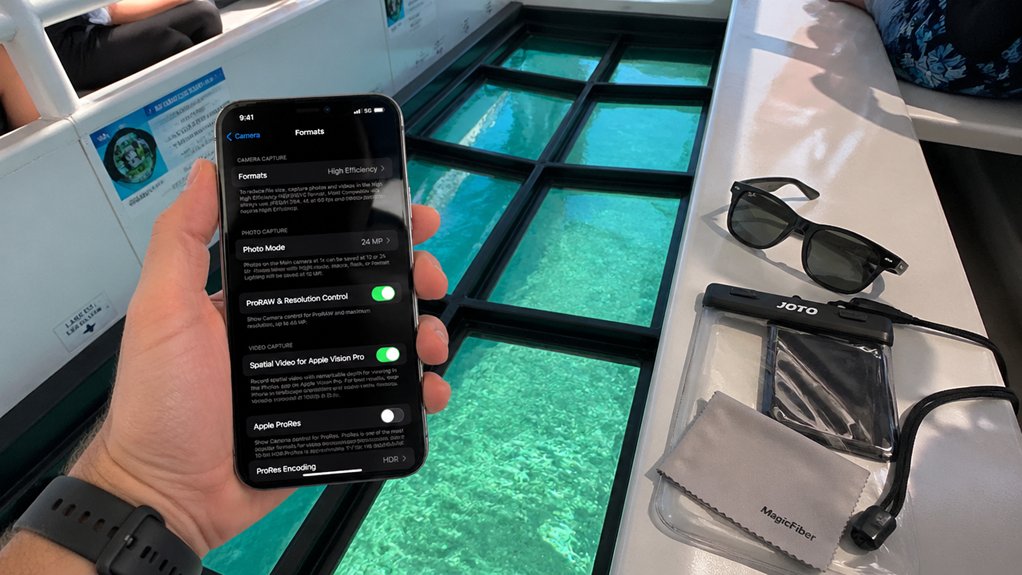
Start with a quick camera tune-up before you step onto the boat, because the best glass-bottom photos usually begin in your settings menu, not on the water. In your Phone Camera, turn on gridlines so the horizon and glass panels stay level. Switch on HDR or Smart HDR too. It helps you hold bright surface glare and shadowy reef detail in the same frame. Then tap the glass area and slide exposure down a touch. You’ll save highlights on sunlit water and keep underwater texture. If your phone offers Action or Motion mode, use it, or choose a fast shutter around 1/500s. Burst mode helps when the boat bumps and sways. Finally, disable flash and Live Photo. Both can add glare, blur, and ghosting. Clean the viewing panel first, since even light smudges on the glass bottom can soften detail and reduce contrast in your photos.
Clean the Glass for Clearer Photos
Wipe the glass like it matters, because it does. Before you aim your phone at reefs or darting fish, clean both sides with a microfiber cloth and an alcohol-based lens wipe. That ritual cuts salt, fingerprints, and oily haze that turn scenes into mushy blur.
Treat the glass like part of the shot: clean both sides, or salt and smudges will steal the reef.
On a glass bottom boat tour in Waikiki, bright sun and constant ocean spray make clean viewing panes even more important for sharp phone photos.
- Swipe the inside surface, where sunscreen smears and curious hands leave marks.
- Hit the outside last, right before shooting, because salt spray returns fast on open decks.
- Use a small squeegee or folded microfiber to chase droplets and streaks from the pane.
Skip paper towels and harsh cleaners. They can scratch the glass and scatter light forever. To clean the glass for clearer photos, press your lens close and take a test shot. If it looks crisp, you’re set.
Use Full Resolution for Glass-Bottom Shots
Set your phone to full resolution so you keep the tiny reef textures, fish patterns, and sandy ripples you spot through the glass. Those extra pixels give you room to crop later without turning a sharp turtle or coral patch into a blurry guess. It takes more storage, sure, but you’ll thank yourself when one great frame needs a tighter cut. On glass-bottom tours, full-resolution shots can better preserve the underwater details you notice during the ride.
Max Detail Capture
Chase every bit of detail your phone can hold, because the view through a glass-bottom boat often hides tiny rewards like fish scales, coral ridges, and ripples of sand far below. Before you shoot, set your phone to its highest-resolution photo mode. Then keep digital zoom off. Use optical zoom, or press closer to the glass so pixels stay honest. On Waikiki glass-bottom boats, the best viewing spots can help you notice small marine-life details that reward full-resolution shooting.
- RAW files keep more shadow and color detail from blue water and dim reef pockets.
- Full resolution helps you record crisp shell patterns, sea grass strands, and tiny darting fins.
- Lower sharpening and heavy noise reduction so reflections don’t smear texture into mush.
You want clean data, not fake crispness. Let the sensor do the seeing, and edits stay light later.
Better Cropping Flexibility
Because the boat shifts and the glass panel rarely lines up perfectly on the first try, extra resolution gives you room to compose later without giving up the good stuff below. Set your phone to its maximum resolution, then frame wider than feels necessary. Leave 20 to 30 percent extra space around the window so you can straighten the horizon, trim glare, and center that reef or ray afterward. To help reduce glare, avoid shooting when strong reflections are bouncing off the glass and water surface. Use your main lens, not digital zoom or the ultrawide, because cleaner optical pixels survive tighter crops. If your phone lets you capture RAW, HEIF, or ProRAW, use it. You’ll keep more color and shadow detail in ripples, coral, and sand. Skip filters and HDR too. They can blur the textures you’re trying to save.
Still comparing Best Phone Settings For Glass Bottom Boat Photos?
Ask for tour ideas, hotel suggestions, or a simple trip plan that combines both.
Trip Helper
Turn On HDR for Water and Fish Detail

Often, turning on HDR or Smart HDR is the easiest way to hold detail in both the bright shimmer on the water and the darker fish moving below the glass. You should enable HDR in Camera settings so your phone blends multiple exposures and keeps highlights from blowing out. It also lifts detail under the surface when noon sun makes the scene harsh. In Waikiki, best time of day for underwater color can also improve the natural tones your phone captures through the glass.
Turn on HDR or Smart HDR to preserve bright water shimmer and reveal fish detail below the glass.
- Silver ripples stay textured instead of turning white.
- Striped fish keep shape in the shadows.
- Sunrise and sunset colors look richer through the window.
Leave Auto or Smart HDR on when light shifts fast. For strong backlight over the viewing panel, HDR usually helps. Just review a few shots, since quick fish can sometimes look slightly ghosted, in a few frames.
Tap to Lock Focus and Exposure
When the boat rocks and the light keeps bouncing off the water, your camera can start hunting at the worst moment. To stop that, tap and hold over the glass-bottom window until AE/AF Lock appears, or until you see the yellow box and sun icon on iPhone. This lets you tap to lock focus and exposure so the scene stays steady while the boat shifts.
After that, slide the sun icon, or use exposure compensation, to brighten reefs or tame surface glare without losing focus. Lock before shooting bursts or video, especially when fish dart past shadows and reflections. On a Glass Bottom Boat Waikiki tour, these quick adjustments help first timers get clearer underwater shots through the viewing window. If clouds roll in or the sun shifts, relock on a midtone patch over the water. Your phone will behave less like a tourist and more like a guide.
Use Action Mode or a Fast Shutter
Once focus and exposure stay put, you can turn your attention to motion. If your phone offers Action or Motion mode, switch it on before the boat leaves the dock. It uses smart multi-frame processing to keep fish, ripples, and the boat’s sway looking crisp instead of smeared. Because Waikiki boat chop can vary from calm harbor water to a mildly rough ride offshore, fast settings help protect sharpness as conditions change.
- Set Action mode, or choose about 1/500s or faster if you have manual shutter control.
- Pair that speed with ISO 200 to 800, raising it only when clouds or harbor shade dim the water.
- Turn off Live Photo or long-exposure effects, enable burst mode, and test a few frames before departure.
You’ll hear the hull slap, see sunlight flicker on the glass, and feel how quickly a sharp frame can disappear when dolphins decide not to.
Avoid Digital Zoom and Move Closer
Back up your fingers from the zoom slider and lean your phone closer to the glass instead. Through a glass-bottom boat, digital zoom just crops pixels, so detail softens and noise creeps into water and coral texture. To avoid digital zoom and move closer, bring your phone within 2 to 6 inches of the viewing window. That cuts reflections, helps autofocus grab fish instead of glare, and keeps the lens using its field of view. In Waikiki, water clarity can make native focal length shots through the glass look especially clean when conditions are good. If your phone offers optical zoom, use that up to its lossless limit, like 2x on some models. When you can’t get closer, stay at the native focal length and crop lightly, around 1.5x. You’ll keep more detail, and your burst shots have a chance of still looking crisp.
Use Gridlines to Keep Horizons Straight
Turn on your camera grid before you board, and you’ll get a clean 3×3 guide that makes the bright sea-to-sky line much easier to place. As you frame the shot, line the horizon up with the top or bottom gridline so your glass-bottom boat photo looks balanced instead of slightly tipsy. Keep an eye on railings and glass edges too, because when those lines sit neatly on the grid, your photo feels calm, crisp, and ready for the reef below. This is especially helpful during the best time of day for a glass bottom boat tour in Waikiki, when the horizon is often extra bright and noticeable.
Enable Camera Gridlines
Often, the simplest setting makes the biggest difference, and your phone’s gridlines are a quiet hero when you’re shooting through a glass-bottom boat. To enable camera gridlines, go to iPhone Settings > Camera > Grid, or open Android Camera settings > Grid. Once they appear, your screen feels more organized, especially with bright glare, moving water, and the boat’s frame competing for attention. On a stroller-friendly Waikiki glass bottom boat outing, gridlines also help you frame quickly one-handed when you’re balancing family gear and trying to keep the horizon level.
- You’ll place reefs, fish, and the boat edge using the rule of thirds.
- You’ll spot slight tilt faster when waves and reflections play tricks on your eyes.
- You’ll recompose after tapping to lock focus or exposure without losing balance.
Later, your phone’s crop and rotate editor uses a similar grid, so quick fixes feel easy before you post that turquoise, sun-flecked scene online.
Align The Horizon
A straight horizon gives your glass-bottom boat photo instant calm, even when the deck keeps wobbling under your feet. Turn on the camera grid, then align the horizon with the top or bottom horizontal line so the sea stays level against the sky. To shape the scene, place the horizon on the lower third for glowing clouds, or the upper third to show reefs, fish, and rippled sand below. On a Waikiki glass bottom boat tour, this simple horizon check helps you capture both the ocean surface and the underwater view more clearly. If the boat tilts, brace yourself, rotate your phone until the line looks true, then tap to focus and shoot. Level or gyro assist helps while waves jostle you through bursts or timer shots. Later, open Edit and straighten any leftover tilt with Rotate until the horizon snaps neatly into place in tiny precise steps.
Change Your Angle to Cut Reflections
Lean in and change your viewpoint, because a small shift can make the water below snap into view. Crouch low and tilt your phone so the glass sits at a steep 30 to 45 degree angle to the water. That simple move cuts mirror glare and reveals coral, sand ripples, and fish instead of sky, rails, and objects in the foreground.
- Step a few feet forward or back and watch reflections slide away.
- Shade the glass with your hand, jacket, or shoulder near the phone.
- Add a clip-on polarizer to knock down glare, especially when you’re about 90 degrees to the sun.
Mid-morning through mid-afternoon often works best. This lines up well with Morning vs Afternoon glass bottom boat timing, since stronger overhead light usually makes it easier to see below the surface. If the sun sits low, keep shifting until bright streaks disappear. It’s part treasure hunt, part tiny dance on deck.
Shoot Bursts and Edit With a Light Touch
Fire off a burst when fish dart past the window or the reef suddenly looks razor sharp. On most phones, you just press and hold the shutter, and you’ll grab 10 to 20 frames each second. Before you do, tap and hold on the clearest patch of glass to lock AE/AF, so your phone won’t hunt for focus mid-sequence. Keep ISO low, around 100 to 400, and aim for 1/250s or faster when light cooperates.
If you’re packing for the trip, keep your phone easy to reach alongside other glass bottom boat tour essentials so you don’t miss a quick photo moment. Later, choose one frame, not ten. That’s one of the smartest Tips for Taking cleaner boat photos. Add only a little sharpening, a small contrast lift, and a touch of clarity. Skip heavy filters. They flatten coral color and kill reflection detail. Crop gently, straighten the horizon, and nudge warmth or exposure only if needed.
Frequently Asked Questions
Which File Format Is Best for Editing Underwater Phone Photos Later?
Choose RAW format if your phone supports it, because you’ll keep the most detail, dynamic range, and color for later edits. If you can’t shoot RAW, use HEIC instead of JPEG for better flexibility afterward.
How Much Storage Should I Free Before a Glass-Bottom Boat Tour?
Free 2–4 GB minimum, because when the perfect stingray glides beneath you, you can’t risk a full phone. If you’ll shoot bursts or 4K, clear 8–16 GB for a safe Storage Buffer and smoother recording today.
Do Phone Camera Apps Outperform the Default Camera for Boat Photos?
Yes, you’ll get better boat photos with Third party apps because they give you manual shutter, ISO, focus, RAW, and glare control. You’ll freeze motion, cut reflections, and recover more detail than your default camera can.
Will a Waterproof Case Affect Photo Quality Through the Glass?
Yes, why not? Your waterproof case can soften sharpness, add glare, cool colors, and cause ghosting through extra layers. Case clarity matters, so you’ll tap to focus and shield reflections for cleaner photos onboard today.
What Time of Day Gives the Best Visibility for Underwater Shots?
Mid-morning, around 9:30 to 11:30 AM, gives you the best underwater visibility because sunlight penetrates better and glare stays manageable. Golden hour looks warmer, but you’ll usually lose clarity from lower-angle reflections and scattered light.
Conclusion
You don’t need a fancy camera to bring home sharp reef shots. Phones now take nearly 90% of all photos worldwide, and with the right settings yours can catch silver fish, rippled sand, and that bright turquoise glow under the hull. Keep the glass clean, hold steady, and trust a quick burst. Later, you’ll scroll past the engine hum and salt spray and find frames that feel surprisingly close to the real ride back home.