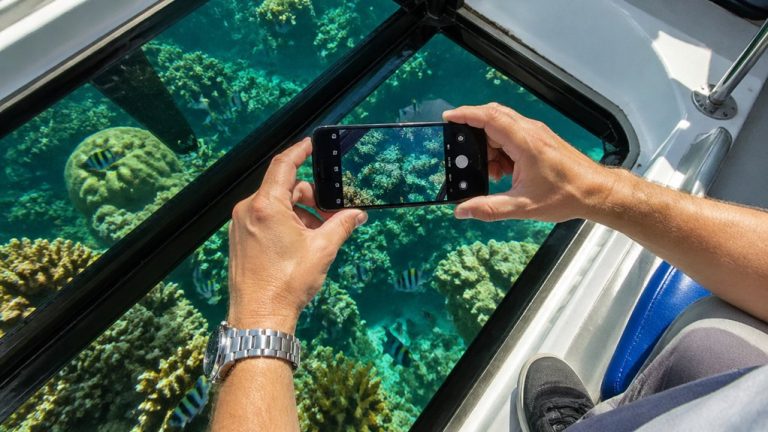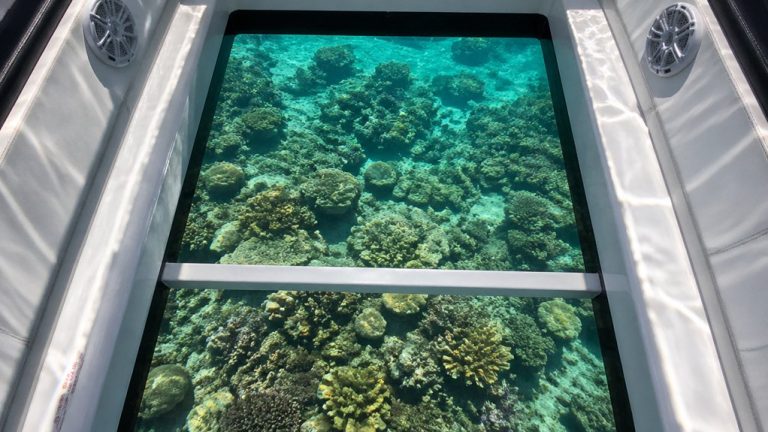
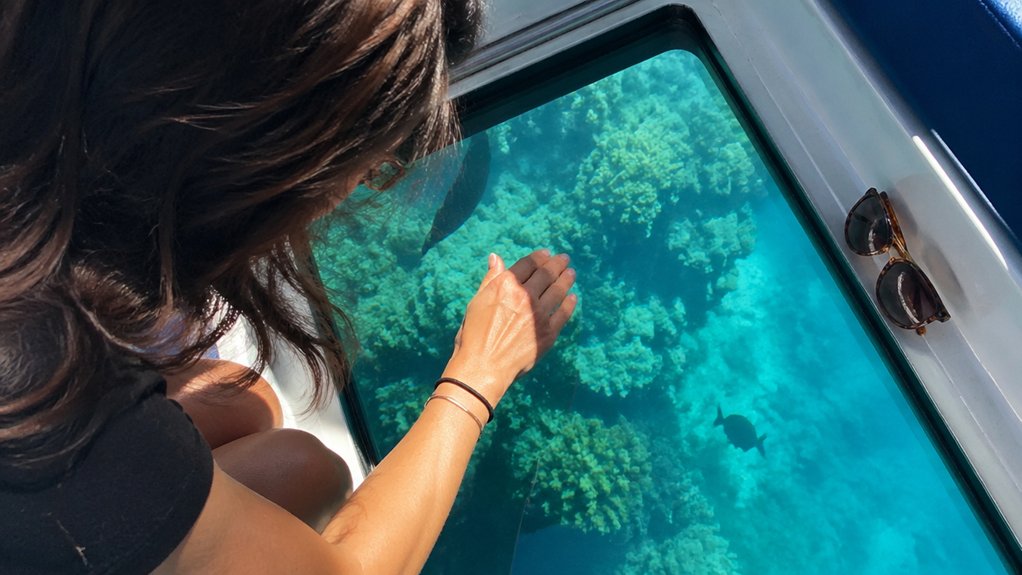
You line up a perfect turtle shot through the glass floor, then catch your own face, the white sky, and a smear from someone’s flip-flop. That’s the challenge with glass-bottom boat photos. The good news is you can cut glare fast with a few smart moves. A tighter lens position, better angle, and a little shade change everything. The difference shows up in seconds, especially when the boat finally goes quiet.
Key Takeaways
- Press your phone or camera flush against a clean, dry glass spot to eliminate the air gap that causes glare.
- Shade the lens with your hand, a dark cloth, or a rubber hood to block direct sun and stray reflections.
- Aim straight down and keep the camera nearly perpendicular to the glass to reduce reflected sky and surface glare.
- Tilt the camera slightly downward and keep bright sky out of the frame for cleaner, clearer underwater detail.
- Wait for calmer water after the boat stops before shooting, since ripples and wake increase glare and blur reef detail.

Oahu Grand Circle Island Experience from Waikiki
Enjoy Grand Circle Island experience tour with breathtaking views of Amelia Earhart Lookout on Diamond Head, admire Chinaman’s Hat in front of Kualo...

Parasailing Experience in Waikiki, HI
Experience the thrill of Oahu parasailing on this unforgettable 1-hour adventure from Waikiki. Soar up to 1,000 feet...

Waikiki Glass Bottom Boat Cruise
Experience the beauty of Oʻahu South Shore as we sail toward Lēʻahi (Diamond Head) aboard the spacious Haleiwa Qu...

Oahu Catamaran Snorkel Tour: See Turtles 100% Guaranteed
Experience one Viator's 2025 Top 20 Best Excursions in the country. This Oahu Catamaran snorkel tour offers unbeatab...
Get Your Camera Close to the Glass
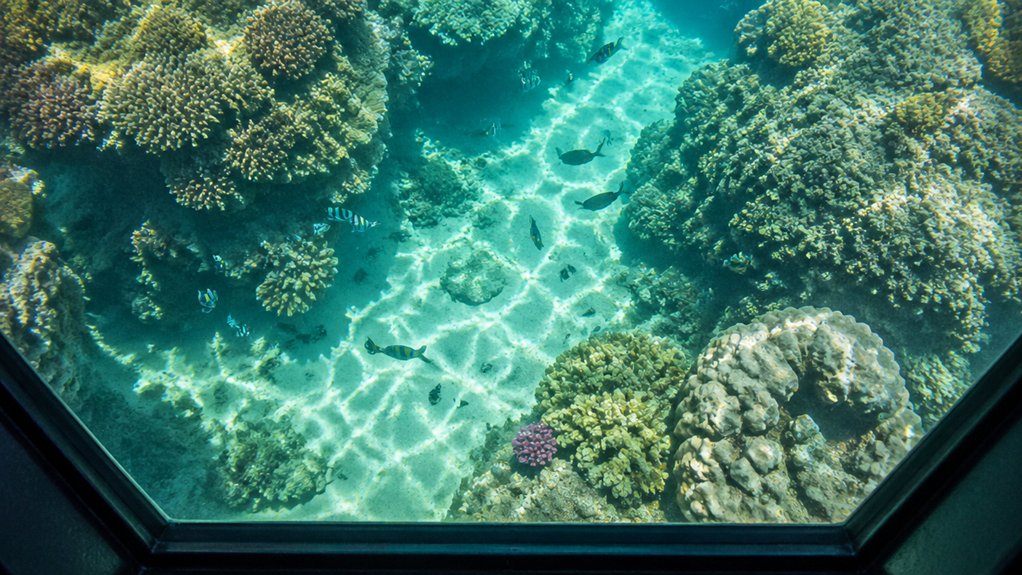
Press your camera right up to the glass and you’ll cut a surprising amount of glare before you even tap the shutter. On a glass-bottom boat, move the lens until it nearly touches the pane. Keep it flush and square to the glass so less sky sneaks into the shot. A rubber lens hood, small foam pad, or silicone cup helps seal stray light and steadies your hands when the water starts wiggling beneath glass bottom boats. This shoot through glass approach also helps improve contrast and color by blocking reflections before they reach your lens. If you’re using a phone, tap to lock focus and exposure before it starts hunting. Wipe the contact spot clean and dry first. On glass-bottom boat tours, even tiny smudges and droplets bounce light back like stubborn little mirrors at the worst possible moment for photos aboard.
Shoot Straight Down Through the Floor
When you aim your camera straight down through the floor, you cut the shiny reflections that bounce across the glass and steal detail from the reef below. Keep the lens as close to a 90 degree angle as you can, because that flatter viewing angle lets more of the underwater light come through cleanly. It’s a small shift in how you hold the camera, but suddenly the fish, coral, and rippled sand look a lot less like they’re hiding behind a window. Using the best phone settings for glass-bottom boat photos can also help your camera capture clearer color and detail through the floor.
Minimize Surface Reflections
Usually, the cleanest glass-bottom boat shots come from aiming your camera straight down and getting the lens as close to the floor as you can, ideally touching the glass. Press on a rubber hood, or tape on a small cardboard collar, and you’ll block cabin glow and bright sky from bouncing back at you. On glass bottom boat tours, that simple seal can reveal sharper coral, fish, and sand below. If you have a short pole or tiny tripod, hold the camera vertical and steady so your hands don’t throw shadows across the Bottom. Overcast skies help too, and so does a shaded roof. Keep Your Eyes Peeled for moments when the water looks darker and calmer. That’s your cue to shoot before reflections sneak back. For the richest reef tones, plan around best time of day for underwater color in Waikiki, when light can bring out more natural blues and greens below the boat.
Flatten Viewing Angle
If you flatten your angle and shoot straight down through the floor, the scene below often snaps into clearer view. Press your lens flush to the glass floor, or use a rubber lens cup, so you cut the air gap that causes bright glare. Keep the camera nearly perpendicular, about 10 to 20 degrees from vertical, to reduce surface reflections and hold underwater details together.
In Waikiki water clarity, this straight-down approach can make glass-bottom boat views look noticeably cleaner and easier to photograph. A tilt screen helps you maintain a flatten viewing angle without awkward twisting. Kneel or lie prone on the deck and aim from directly above the viewing port. You’ll notice less reflected sky and more fish, coral, and rippled sand. If you use a handheld polarizing filter, rotate it while pointing straight down. Then bracket a few exposures. The seabed usually looks cleaner, sharper, and surprisingly vivid.
Wait for Calm Water at Fish Stops
You’ll get cleaner glass-bottom shots when you time fish stops for the smoothest water and resist shooting the instant the boat stops. Wait 30 to 60 seconds for the little slaps and shivers on the surface to fade, then watch for the quiet gap between wave sets. If you can, ask for an early or late stop with the sun at your back, because calm water is helpful and glare loves a bad angle. In Waikiki, boat conditions are often only mildly choppy, so a brief pause usually gives the glass a clearer window for photos.
Still comparing How To Reduce Glare On Glass Bottom Boat Photos?
Ask for tour ideas, hotel suggestions, or a simple trip plan that combines both.
Trip Helper
Time The Smoothest Moments
When the captain eases off the throttle at a fish-feeding stop, get your camera ready and watch the water for its brief glassy mood. In the Sea of Cortez, your best shots often come as the boat slows or drifts and the surface starts to settle. Use those first 5 to 10 minutes wisely.
That short window is when ripples fade fast and tropical fish gather under the glass. If you can, choose early morning or late afternoon stops, when winds usually ease by a few km/h and the water looks smoother. Ask whether the captain can point the bow into the swell instead of sitting broadside, which helps cut cross chop. Also wait half a minute after nearby traffic passes. Boat wakes love to ruin a perfect frame. If motion starts to bother you while waiting for calmer water, steady your breathing and stay focused on the horizon to help with seasickness tips.
Pause Between Wave Sets
The next trick is patience between wave sets. At fish stops, you’ll get your clearest window about 5 to 10 seconds after the boat settles from a few small swells. If you can, stay on the lee side, where the water is often much calmer and the glass clears for a few precious seconds.
- Watch 1 to 3 swells pass, then raise your camera.
- Ask the guide to idle when other boats stop making wake.
- Stand under the roof to cut reflected sky brightness.
- Keep your lens close to the glass during the lull.
That short pause can turn a unique experience into sharp photos. You won’t miss a post later, and you’ll make sure to take the shot home. If you’re helping someone with mobility needs get set up for the shot, it can also help to ask about accessibility questions before boarding so everyone can plan the best viewing spot.
Keep Bright Sky Out of the Frame
If bright sky keeps sneaking into your shot, tilt the camera down toward the water instead of letting it wander up to the horizon. Aim about 30 to 45 degrees downward, and frame fish or reef close to the glass so they sit in the lower third. That simple shift helps you keep bright sky out of the frame and cuts washed out highlights fast. You can also shoot early or late, when the sun sits lower and the surface looks less like a blinking mirror. If you can, turn so the sun is behind you, with the camera between you and it. Wearing neutral colors on a Waikiki glass bottom boat tour can also reduce bright reflections bouncing into your photos. Think of it like reading Use and Privacy or Instagrams Terms of Use: boring at first, useful when glare starts playing games.
Shade the Lens to Block Reflections
Press your camera or phone right against the glass, and you’ll block a surprising amount of reflection before it even starts. Then use your hand, hat, or a dark cloth to cast a small shadow over the lens, because even that simple move can tame the bright sky’s glare. If you can, shift into the boat’s shade too, and you’ll give those fish and coral a much cleaner stage. Packing a dark cloth ahead of time makes this trick much easier to use once you’re out on the water.
Use Your Hand
For a quick fix, turn your hand into a custom lens hood. Hold it a few inches above and around the lens so it blocks direct sun and trims bright reflections off the water or glass. Angle your hand like a tiny visor, but don’t touch the lens.
- Cup your hand wide and shallow if you’re using a phone.
- Keep fingers clear of the touchscreen so you don’t bump focus.
- If you’re shooting through boat glass, press your hand or sleeve lightly around the lens area.
- Tilt the camera slightly downward, and use polarized sunglasses or a polarizing filter.
You’ll steady the shot and see more reef detail, less sky glare, and fewer mirror-like streaks. Think of it as Instagram to stay,agree to Instagrams Terms, while you frame. These simple GoPro tips also work well on glass-bottom tours when you want clearer underwater detail without extra gear.
Create A Shadow
Shading the lens works like bringing your own little eclipse to the glass bottom boat. You want a continuous shadow over the lens that extends 2 to 3 inches past it, so bright sky reflections can’t sneak in. This simple trick is especially helpful on a glass-bottom boat in Waikiki, where bright tropical light can bounce off viewing surfaces fast. Smart body positioning helps. Crouch or kneel so your head and torso cast shade while you keep the camera aimed down and tilt it 20 to 30 degrees to calm internal reflections.
For a phone, make a snug clothing shield by pressing a dark microfiber cloth or small hood around the lens area. With a DSLR or mirrorless camera, use a short rubber hood and cup your free hand around it. In harsh midday sun, build a portable shade with a dark jacket or towel over your head and camera. It’s wonderfully low tech.
Press Close To Glass
Right up against the glass, your lens can do its best work. Press your phone or camera directly onto a clean, dry spot and use lens sealing to erase the tiny air gap that causes glare. Add your hand, a hood, or a dark cloth for better contact framing, and stray reflections from sky and boat rails fade fast. This works especially well while viewing Waikiki reefs from a glass bottom boat, where underwater details are easier to capture cleanly.
- Check for smudges or droplets first.
- Use a gentle pressure technique and brace your elbows.
- Keep the lens shaded while it stays sealed.
- Tip the camera slightly downward to dodge bright highlights.
You’ll notice clearer fish, sharper coral, and fewer ghostly reflections. The boat may rock and creak, but your shot stays steadier when the lens rests flat against the glass for those wiggly waves.
Turn Off Flash for Clearer Shots
Often, the quickest way to get a cleaner glass bottom boat photo is to turn your flash off. Flash bounces off the glass and water, creating glass glare that wipes out fish, coral, and true color. On wet panes, it also sparks bright hotspots from droplets. Force your phone or camera to no flash, even if auto wants to help. Then adjust ambient exposure with a higher ISO or a wider aperture so you keep detail without reflections. If the cabin is shaded, you’re in luck. The darker interior cuts reflections and lets you see deeper. At low-light fish-feeding stops, try flash alternatives like bracing the camera on the glass or using image stabilization. Your shots stay sharper, and the underwater scene looks vivid. If your tour runs longer and the boat includes restroom facilities, you may have more time to wait for calmer water and better natural light before taking photos.
Use a Polarizing Filter if You Have One
If you’ve got a circular polarizing filter in your bag, this is the moment to use it. Rotate the CPL while you watch the scene, and you’ll see glare fade, often dramatically.
- Turn it slowly until reflections from glass and water darken. The best polarization direction usually appears about 90° from the sun.
- Expect richer blues, greener coral, and fish that pop with better contrast.
- Plan for exposure compensation, because a CPL usually costs you 1 to 2 stops of light.
- Pair it with a lens hood, or press the lens rim to the glass and shade the area with your body.
It won’t fix cabin light or scratched glass, so keep up with circular mechanism maintenance, and let the filter do heavy lifting. For boat safety essentials, make these adjustments only when it’s safe to do so and avoid blocking walkways or distracting crew.
Wipe the Glass Before You Shoot
Start with the simplest fix: clean the viewing panel before you raise the camera. Your cleaning timing matters because fresh salt spray, fingerprints, and smudges can return fast on a moving boat. Use cloth selection: a microfiber cloth plus a mild, water-based glass cleaner lifts grime without scratching. Wipe in small circles first, then finish with vertical strokes so streaks don’t sneak into your frame. For quick touch-ups, keep lens wipes or alcohol-free glass wipes handy between shots. If staff can help, ask for a final wipe-down right before you shoot. This is especially helpful on busy Waikiki departures, where glass bottom boat parking can affect how rushed your boarding and setup feel. Then focus on moisture removal. Dry the panel completely, inside and outside when possible, because tiny droplets bend light into bright specks and soft blur. Clean glass gives reefs and fish a crisper stage.
Remove Slippers to Reduce Reflections
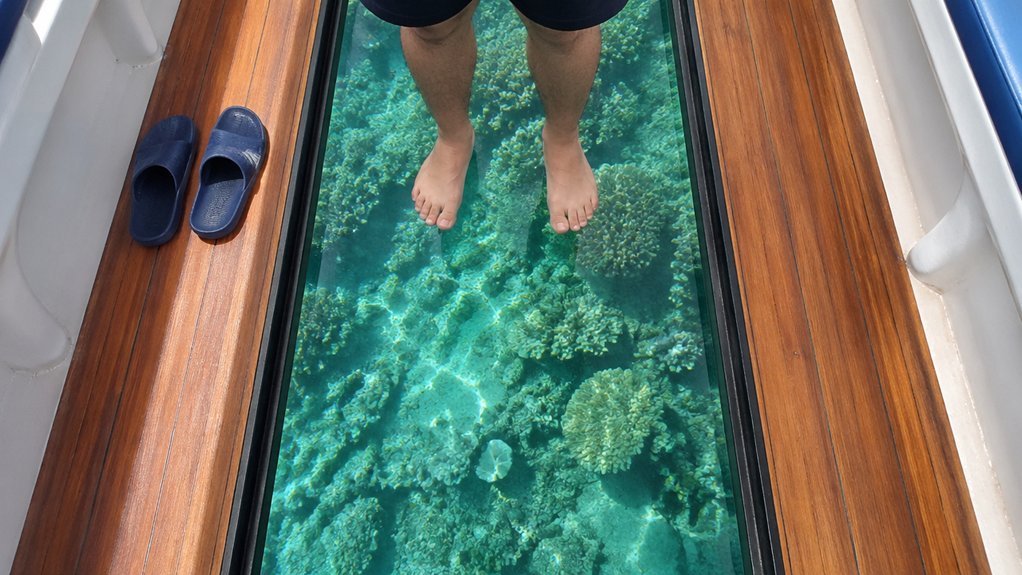
Sometimes the easiest way to cut glare is to slip off the boat’s provided slippers before you shoot. Extra soles add shiny surfaces, trap dust, and leave tiny smudges that sparkle in photos. Bare feet create better foot to glass contact, so fewer air gaps turn into mini mirrors. This tip can be especially helpful for families managing a stroller-friendly trip in Waikiki, since simpler boarding routines leave more time to set up clean shots.
- Check slipper removal timing before you kneel down to frame the shot.
- After removing them, wipe the pane with microfiber for a cleaner view.
- Press your camera directly to the glass, or use a rubber hood to block bounce-back.
- If slippers are required, let slipper material choice guide you toward thin, matte soles.
You’ll notice calmer highlights, richer contrast, and fewer surprise flares. Your toes might even become part of the technique.
Choose the Best Time to Shoot
In the early morning, the glass often behaves better. You’ll usually get cleaner views 30 to 90 minutes after sunrise, or again before sunset during golden hour, when the sun sits lower and stops blasting harsh reflections across the water. This is why many photographers prefer morning tours over afternoon trips when planning a glass-bottom boat outing in Waikiki. Skip solar noon if you can. Once the sun climbs high, underwater detail fades fast. You’ll also help yourself by facing so the sun stays behind the boat or off to the side, not straight ahead. Slight haze or thin cloud can be a gift, softening the sky without killing clarity below. If your tour circles back, watch for the calmest patch of water, since smaller wavelets mean less sparkle and smear. Tidal variation and seasonal visibility can also subtly change what you see.
Use Fast Shutter and Tap-to-Focus
Lock things down before the boat bounces again. A fast shutter, around 1/500s or faster, freezes ripples and your own wobble so bright glare streaks don’t smear across the frame. Then tap the underwater subject, or a clear patch of glass, so your camera stops chasing the shiny sky. These fast exposure tips work best when you add exposure lock and simple focus lock techniques. This matters even more on glass bottom boats, which are ideal for non-swimmers because they let you enjoy underwater views without needing to get in the water.
- Set a shutter priority workflow and keep shutter speed high.
- Tap to focus where you want detail to stay sharp.
- Hold AE-L after focusing so glare doesn’t fool the meter.
- If light allows, use f/8 to f/11, or a polarizer through thick glass, for cleaner texture and stronger depth below the hull’s soft creaks today.
Fix Reflections and Haze in Photos
Once your shutter speed and focus are behaving, the next battle is reflection and haze. Get low and press your lens or phone right against the glass rim or floor. That tiny move removes air gaps and can slash glare dramatically. Add a circular polarizer, or a clip-on version for phones, then rotate it while watching the screen until reflections fade and underwater contrast pops. Shade the viewing area with your body, jacket, or a dark cloth so bright sky and cabin light don’t wash everything out. Keep the glass clean and dry, because smudges and salt spray turn clear water milky. In post processing, use gentle color correction and dehaze algorithms to recover detail, not invent it. Calmer water helps, too, when possible. Following basic onboard etiquette also helps by reducing unnecessary movement and keeping the viewing area clearer for better photos.
Avoid Common Glass-Bottom Photo Mistakes
Even great water and perfect focus can fall apart if you make a few classic glass-bottom mistakes. Your goal is simple. Cut glare before it starts, then let the fish do the showy work.
- Press your camera lens flush to the glass, or rest it on the floor during fish stops. That kills air-glass reflections.
- Use a polarizer, especially if your lens coating isn’t enough. It tames bright water and boat reflections fast.
- Shade the area with your body or sit inside the cabin. Less overhead light means stronger contrast and less background clutter.
- Watch timing and angle compensation. Lower sun works better, while noon glare and dirty glass create smeared highlights, soft spots, and mystery blobs that look like sea monsters.
On typical Waikiki boat tours, the limited tour time means reducing glare quickly matters more than fiddling with settings after every stop.
Clean glass helps more than fancy gear.
Frequently Asked Questions
Can I Use a Phone Waterproof Case on a Glass-Bottom Boat?
Yes, you can use a phone waterproof case on a glass-bottom boat if you check waterproof compatibility, case buoyancy, and screen sensitivity. Keep it clean, press it near the glass, and reduce reflections in shade.
Which Camera Settings Work Best for Photographing Fast-Moving Fish Schools?
Like Poseidon herding silver arrows, you’ll need a fast shutter, continuous autofocus, and high ISO. Shoot RAW at f/4–f/8, use burst mode, and dial slight negative exposure compensation to protect highlights while tracking schooling fish.
Do Different Glass-Bottom Boats Produce Different Levels of Photo Glare?
Yes, you’ll see different glare levels because boat construction, glass curvature, and water clarity all change reflections. You’ll get less glare on shaded boats with coated, flatter glass and well-bonded panels than on full-glass, warped designs.
Should I Bring a Lens Hood for Glass-Bottom Boat Photography?
Yes, you should bring a lens hood; it blocks stray sunlight and flare. Pair it with a polarizing filter, and watch your hood angle so you avoid vignetting when you press your camera against glass.
How Do I Protect My Camera From Salt Spray During the Tour?
Shield salty spray swiftly: use waterproof covers or zip seal bags, tether your camera, stash silica packets in your bag, wipe lenses with a microfiber cloth, and keep it sheltered until you’re ready to shoot.
Conclusion
You’ll get cleaner glass-bottom shots when you keep the lens tight to the panel, shade it well, and wait for the boat to settle. Aim straight down, skip the flash, and tap focus before the fish slip by. A quick wipe of the glass can make the scene look clear as a bell. Then you can leave with crisp blues, sharp fins, and proof that the reef wasn’t just a blur under your shoes today.